With territory management, Salesforce supports the ability to assign and share accounts with specific users based on field criteria. If your territories are cleanly divided by a single field, then you might have already made use of this feature, but in most real world cases territories are not so clearly split. Since territories cannot always be defined by a single address field, Geopointe gives admins the power to define territories based upon shapes on a map, which can either be drawn or constructed from our library of geographic shapes and include defined areas such as; zip codes, states, counties, cities and more. Once you define your territories on the map, Geopointe can assign records simply based on which territory they fall in.
Identifying a record’s geographic area can help in a variety of scenarios to address use cases ranging from simple to more complex. Some Examples Include:
- Managing assignment areas for your field team
- Manage multiple assignment areas
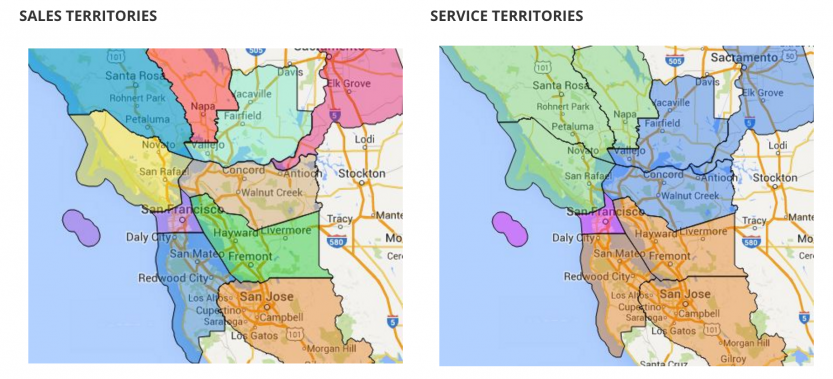
- Different territories for different functions – e.g. Sales and Service Territories
- Hierarchal territories – e.g. Territory Rep and Territory Manager
- Overlapping territories – e.g. Realtors, Case Workers, etc.
- Know which person or group of people (e.g. office, service location) will handle that record
- Know which area-specific rules/processes apply to that record
For example, your fee structure may be based on the poverty level of the area or you may need different documents filed based on local laws - Use area-specific information to enhance your business/organization decisions and processes
- Often the information you need to provide your internal teams, customers, or clients is determined by where a record is located. For example, maybe for each record you want to know approved local venues, local governmental regulations and people, local support resources, timezone, demographic data.
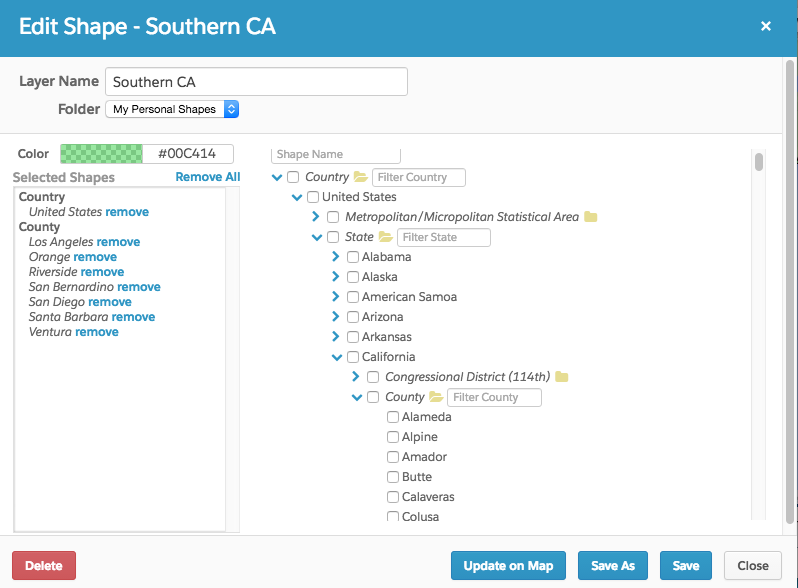
To take advantage of Geopointe assignment plans you will first need to build out territories on the map with shapes. Simple shapes can be drawn on the map using the tools found in the shape tab or on the right side of the map. Alternatively, by clicking the tool that looks like a globe you can access our geo shape library and build out a territory by combining zip codes, counties or states. Once your territories are on the map, you are ready to assign them to specific users with assignment plans.
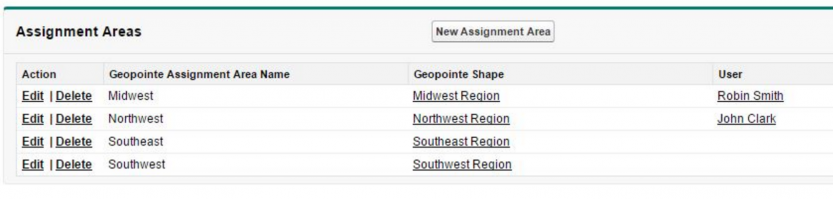
Before creating an assignment plan you will want to go to the Salesforce object containing the records you want to assign and add a custom lookup field to the Geopointe assignment area object. Assignment plan setup can be accessed from the Geopointe setup tab. Click the assignment plan tab, add a new assignment plan, then select the map object to associate with this assignment plan. Give the plan a name, add in the lookup field on the Salesforce object you plan on using to the custom assignment field drop down, and check the reassign owner checkbox which will automatically assign accounts to whoever is specified. To assign a territory shape to a user, add a new assignment area from the assignment plan edit page and add the respective territory and user who will be assigned any accounts contained within the territory. The last but most important step is to head over to the batch jobs tab and schedule the assignment plan batch job which will check and assign accounts based on their location. A batch job can also be manually run from the assignment plan page with the run assignment plan link.
Once the assignment plan is in place and the batch job is running, records will automatically be assigned to their set users. The process of assigning accounts based on their complex territories is now secure and fully automated.
For more information on territory management and assignment plans using Geopointe, visit our help site articles:
Try it for yourself and start your free 15-day trial from the AppExchange today!


