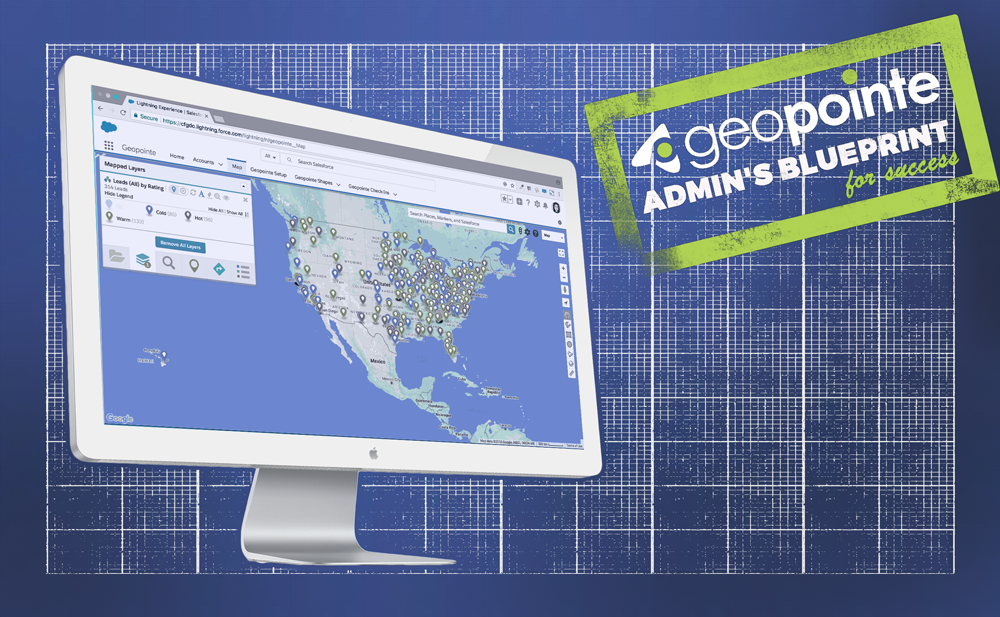
Key Geopointe Resources to Successfully Guide Your CSM Team
The teams you deploy to manage your customers or clients are an integral part of customer retention and company growth. So whether you refer to them as Relationship Managers, Customer Service Managers, Account Managers or Customer Success Managers (CSMs) – as they will be referred to throughout this blog – it’s imperative to provide them with the right tools that will effectively manage the customer experience. With Geopointe, CSMs can easily stay on top of the customer’s journey, ensuring that all of their the accounts receive the service and attention they need. If you’re a Geopointe Admin tasked with bringing a CSM up to speed with Geopointe, this blog will educate you about features that will help your team build stronger relationships and gain deeper customer insight.
Visualize Customer Interactions
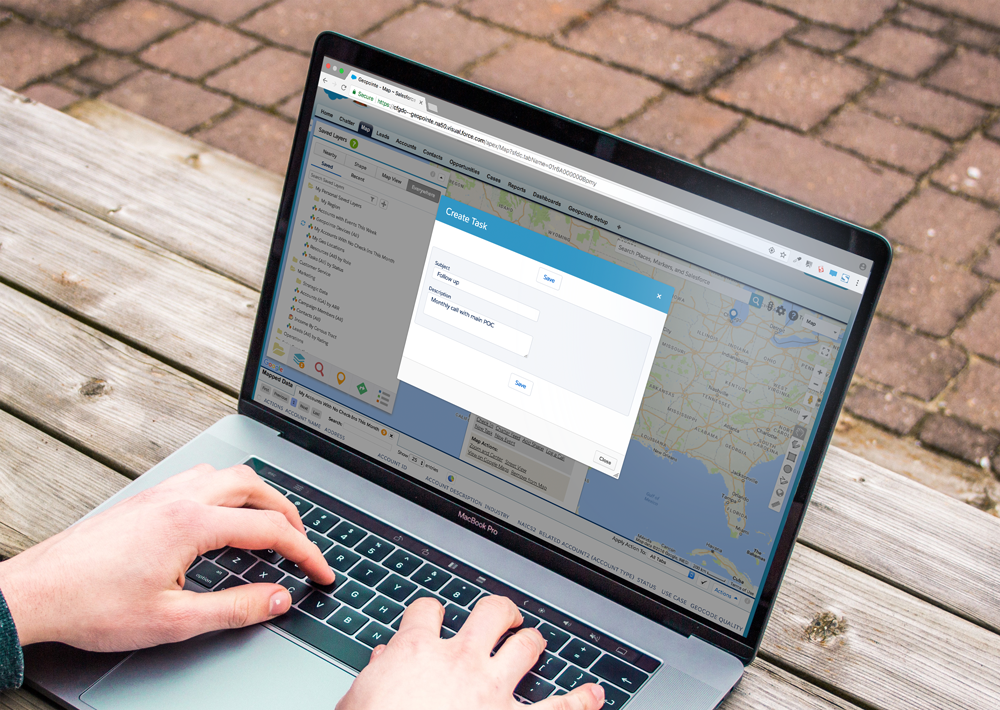
Filtering data sets by activities provides an instant picture of a customer’s interaction history, revealing which accounts are due for touch points. With a few clicks, CSMs can schedule calls and meetings directly from the map, ensuring customers don’t slip through the cracks. Filtered data sets can also be used in conjunction with Shapes or Nearby Searches to plan upcoming trips and create optimized driving routes.
To set up Activity filters, configure a data set with a Cross Object filter that shows Accounts with Activities or Tasks, then use Smart Dates to filter by time range (e.g., Last Month). For example, you could narrow it down to Accounts with no Check-Ins in the last month, presenting the CSM with a task list of overdue customer touches.
Make Mass Updates Right From the Map
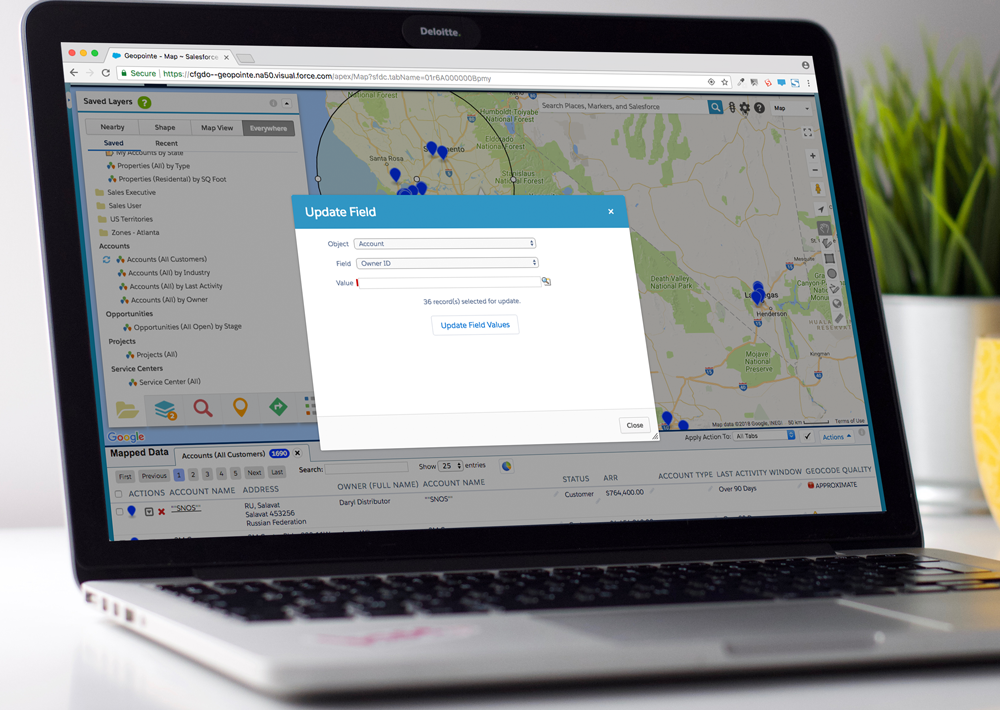
For many CSMs, managing account details is part of the daily workload, tedious as it may be. With the ability to edit fields for multiple records at a time, directly from the map, account updates can be completed without ever navigating away from Geopointe. This may be especially useful for supervisors assigning records geographically. They can select records within a shape and update a CSM field on all those records, with just a few clicks.
To deploy this action for users, it must be activated in the Actions tab, then shared using the User Access link next to the action. You can utilize the Salesforce Sharing model to share or restrict access to groups, roles, or specific users in your org. Users can update fields directly from the map view or by selecting records in the list view below the map.
Build More Relationships On the Road
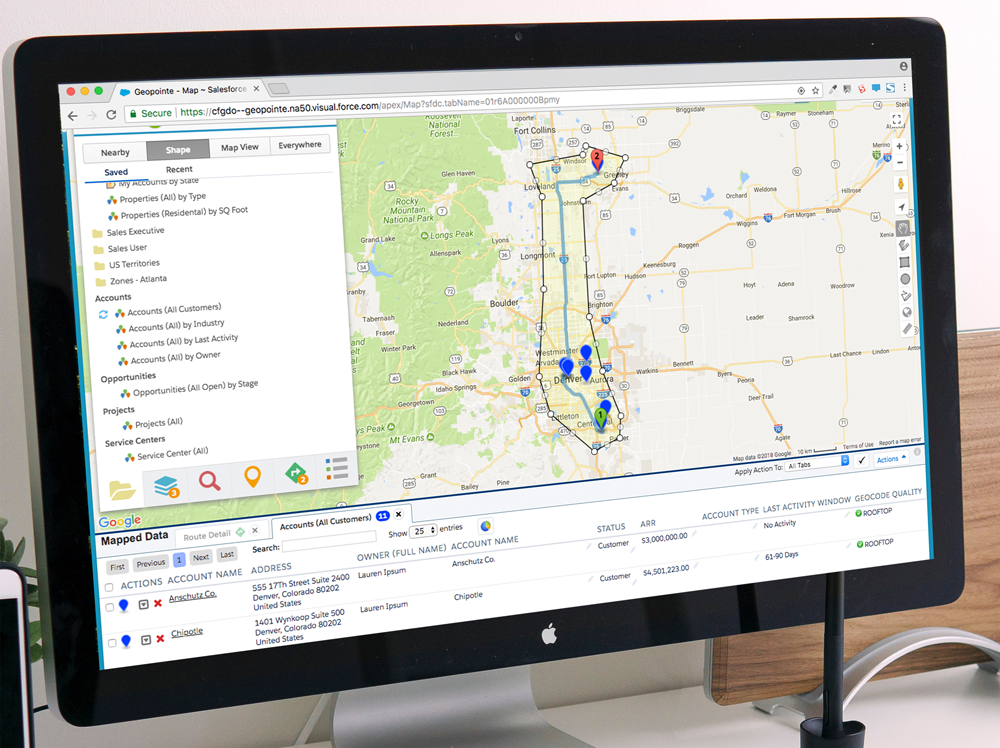
With the power of a Shape search, users can maximize their impact while they’re on the road. For example, perhaps a CSM or Account Manager has scheduled a trip to meet face-to-face with an important customer, but they want to take advantage of their time on the road and meet with other accounts s along the way. They can easily search for other Salesforce records that require just a quick detour, then fill out their route accordingly.
CSMs can take advantage of this tip by simply loading a scheduled route to the Map, then using the freeform Polygon Drawing Tool to create a shape around that route. Using the Shape search method, they can run a data set search and add records to create additional route stops.
Filter Records Visually in Real-time
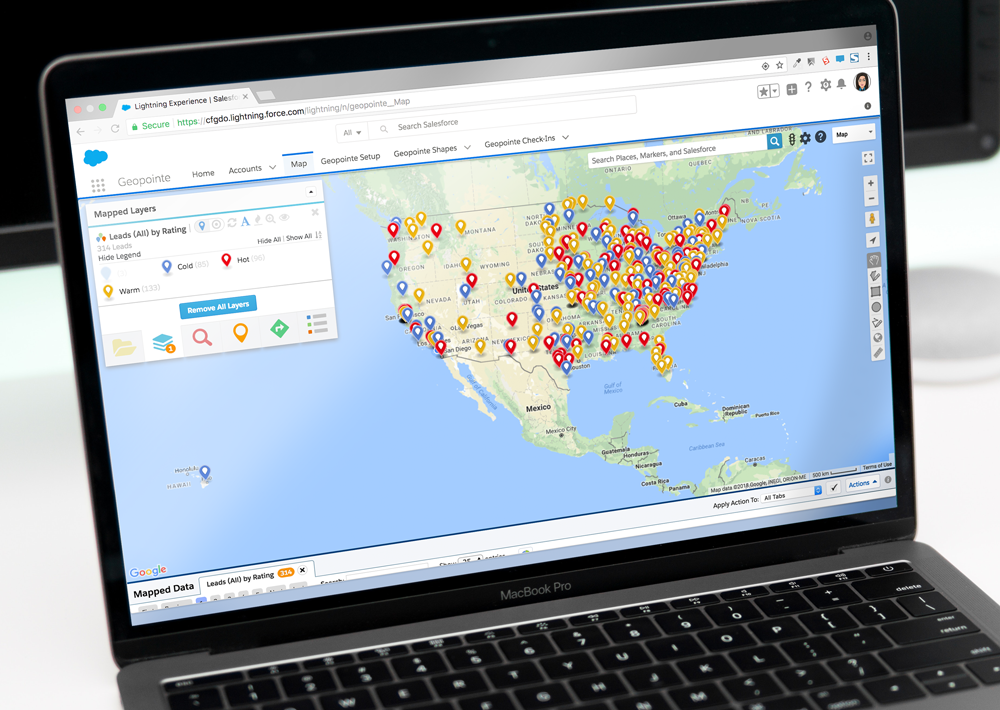
Color-coded markers make reporting more dynamic and powerful. Perhaps your CSM team wants to see accounts with upcoming renewal contracts, color-coded by month. They can visualize this data at a glance and toggle markers on and off to filter visible records based on when their renewal is due.
To set this up, use the Fields tab of the data set editor to add a field that you want to color-code, then use the Markers tab to represent the field values with colors. In the Show Legend feature of the Mapped Layers tab, CSMs can filter the records in real-time by toggling the marker colors on or off, giving them a dynamic picture of their upcoming objectives.
Update Records With A Few Clicks
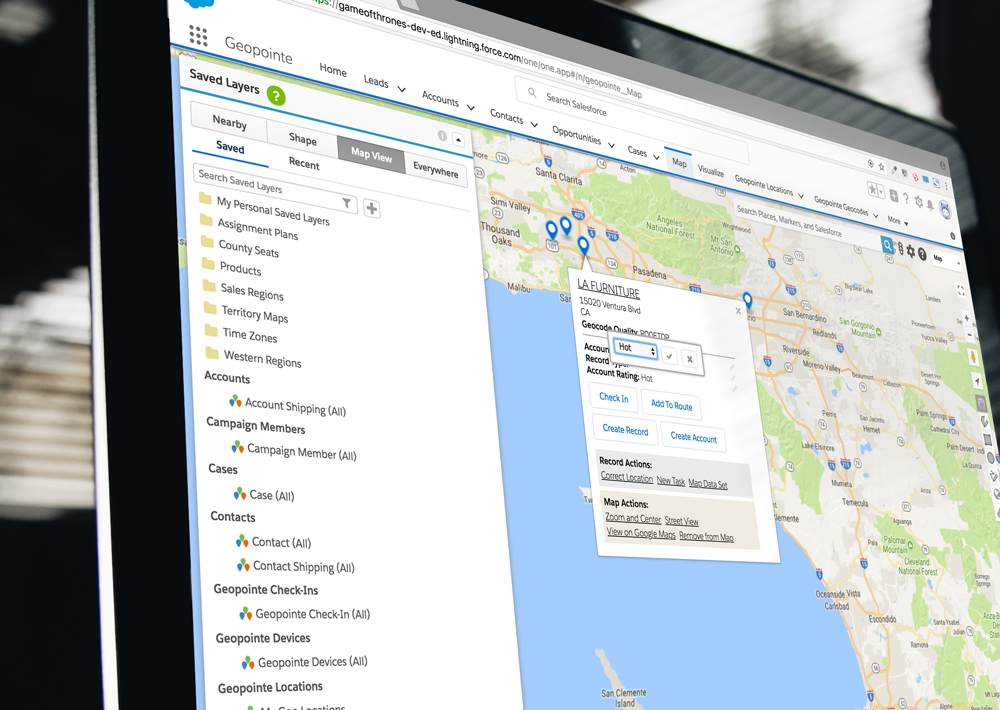
Inline editing is another efficient way to make field updates inside Geopointe. With this feature, changes can be made to individual records on the map, right from the record info window, providing on-the-fly account management. Keep in mind that fields must be added to the data set to be edited with this method.
Geopointe Admins can turn this option on or off from the Org Settings tab of Geopointe Setup. Users can edit fields as long as they have been added to the data set, and as long as they have Write Access to that field.
Are you a Geopointe Admin looking for helpful resources to assist your team? Follow the link below for more role-specific tips and tricks!


